Thursday, March 21, 2013

How to Paint Your Nails

Nobody wants to have boring nails. If you are into fashion, you will want fashionable nails. What could be a better way to express your personality than with a fun nail polish color? You can go for any effect you like with your nails, such as classic red, happy yellow, creative green or you can go plain and paint your nails black!. You can even make your polish match your outfit! With all this excitement, it's easy to skip over the fact that painting your nails yourself is sometimes quite difficult and time consuming. Though it is time consuming, it can add flair to any outfit! Read on if you'd like to learn some useful tips on painting your nails that you can use now or in the future!

1. Choose a nail polish in the color of your choice. Bring it to your manicure area/table. If you would like, you can choose a sticker (nail art) to put on your nails. There are hundreds to choose from.

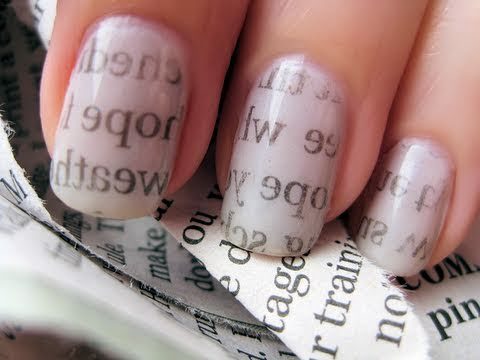
2. Gather some cotton balls, then use an orange wood stick. nail polish remover, towel, newspaper, and clear nail polish. Paint your nails in a well-ventilated room. The fumes can be extremely dangerous to your health.

3. Take off any old polish. If you have any that is, especially if it's chipped. If you don't have any nail polish on, then swipe some nail polish remover over your nails before you begin painting, to get rid of any natural oils on your nails. This will keep the color smooth and help the color last longer.


4. Rub the bottle between your hands to warm the nail polish for about 25-30 seconds. Open it, and scrape some of the excess polish off on the side of the bottle. Don't shake it. Rolling the bottle keeps bubbles out of the polish and keep your nails smooth.
 
5. Apply one coat of clear nail polish (base polish works best!). Allow it to fully dry to the touch before proceeding. It's okay if some of the color gets on your skin. Nobody will be able to tell since there's no color!
 
6. Paint one stripe of color in the middle of your thumb or pinky nail. Then, paint a stripe on the left, continuing to the right. This subtly focuses the color in the middle of the nail. Remember to keep your hand steady. Don't worry if it looks too thin -- it's supposed to. Re-dip your brush into the bottle before starting the nail so the color is evenly distributed throughout your nails. Let it dry completely before adding your last coat. You may have to wait 10-20 minutes, so you may want to turn on your television or some music.
 
7. Add another coat of color if desired, depending on the shade of color you want. Bear in mind that if you want a color very similar to the bottle you should paint two coats, but if you want a lighter shade then skip to the next step. Let this dry. Remember that the top coat is the one everyone will see, and the one that you'll feel. Keep that coat smooth!
8. Paint a last coat of clear polish to keep the color lasting for at least one more week. This seals and protects the color.
 
9. Place a sticker on your nails gently. It's recommended that if you are going to do them on your thumbs to put it on the side of your thumb nail that you can see when you put your hand down flat.
 
10. Get fabulous! If you want textured and fashionable nails to suit the glamours style for 2013, then put on a base coat and sprinkle some sugar on, this makes them look like you have had a REALLY expensive job done on them because the sugar turns into little crystals all over the nail and leaves a shimmering finish. And it comes off just like normal nail polish!


6 Easy Tips to Keep Your Nails Healthy and Strong

Our fingernails are always so exposed. They can harbor bacteria, become brittle and just plain unattractive when you don't take care of them. Here are some tips to keep your nails in tip top shape from keeping them clean to primped and pretty. 

1. Keep your nails hydrated. Rub a bit of Vaseline or moisturizer with Vitamin E on your cuticles before you go to bed (so it doesn't rub off during your daily activities). It will keep your cuticles from looking dry and rough.

2. Don't file your nails right after you shower. They're weaker and more likely to break. Also, file in one direction instead of back and forth. This can weaken your nails, too. Make sure to clean under your nails daily. 

3. Apply a fresh layer of topcoat every 1 to 2 days to prolong the length of your manicure and keep your fingers looking pretty and chip-free.

4. Wear gloves when washing dishes or using cleaners. These can be very harsh on your nails and cuticles, causing them to become dry, brittle and discolored.

5. If you have a favorite pair of boots or close-toed shoes, let them air out or rest a day between wearing them. Sweat and humidity can cause fungal infections.

6. Avoid biting your nails and cuticles - this can cause infection!

Water Marble Nail Art Tutorial

Water marble nail art creates a fantastic look but it's a tricky technique to master. I get so many compliments when I marble my nails, but it can be a little messy and time consuming. One bonus is that you don't need any brushes, dotting tools, rhinestones or anything.
All you need is a shallow bowl of room temperature water and some vaseline (or lip chap) or tape. You can either rub vaseline onto the skin around your nail bed or tape it, so when you dip your finger into the water you can remove the polish from your skin.

Tips & Tricks

  • If your first drop doesn't spread out as much as you want, you can gently pull the sides out.
  • Leave the lids of your polish unscrewed so you can get the drops in quickly.
  • The vaseline is really good for your cuticles, and it helps with polish removal! If you would prefer to tape.
  • If the water from your tap is too hard the polish won't spread out, try filtered water.
  • Make sure your white (or whatever color you want!) base coat is smooth, if it's streaky or lumpy it will show through after you dip your finger.
  • I use toothpicks when I marble, but you could use a bobby pin in a pinch.
  • Wipe the polish off your toothpick in between each "swirl" when you're marbling to ensure clean lines.
  • Glitter polish works too, although you'll find through experimenting some polishes work better than others.
  • Pull your finger straight out of the water, angles can sometimes cause water bubbles. If you do get some bubbles, try to blow them off, or do what I do and hide them with rhinestones.
  • A thin angle brush dipped in acetone or polish remover works really well for clean up.
  • If you drop the polish too high it will fall to the bottom of the bowl.


Splatter nails

They are super cool and easy to do, but they make a huge mess!
Aside from the mess, this tutorial is a breeze. Play around with your color choices and make something beautiful!


Tips & Tricks

  • Lay out newspaper to work over. Put out more than you think you need....the polish is going to splatter everywhere!
  • Experiment with how high or low you hold the straw over your nail to get different effects.
  • When you dip the straw, try to get polish all across the opening of the straw, not just a ring of polish. It will splatter better.
  • If you're using a bendy straw, cut the bendy bit off.
  • Make your blows short and sharp. One quick little puff will splatter it better.
  • Be patient! This one takes some practice!

Amazing Nail Art Designs Using Scotch Tape

If you've ever wondered how girls get perfectly geometric nail art, the execution probably involved something as simple as cut-up Scotch tape. These simple visual tutorials show you how to make some striking designs without a trip to the salon.

1. Tiny Strips

2. Gingham/Plaid Nails


3. The Chevron


4. Checkered Nails


As Seen On TV Salon Express Nail Art Stamping Kit

Salon Express, get beautiful salon quality designer nails in minutes! Now you can create sensational nails anywhere with Salon Express. Professional salon results in minutes. Use Salon Express with any nail polish - simply brush polish onto design plate, scrape off excess polish and transfer design onto the stamp. It’s that easy. Everything you need for amazing nails, use the large applicator for large designs or the small applicator for single smaller designs. It’s fun and easy to create hundreds of salon designs. Salon Express nail design kit will save you tons of money and time!

The retail price of this kit is like almost all other As Seen On TV products: $9.99.

when I first saw this on TV I thought it not going to work, just like the other things they sell on TV.
I brought it to see if it would work and it did. It is a awesome thing to have if u like to make your nails all fancy.


Wednesday, March 20, 2013

The Coolest Nail Looks and Designs!

Seeing Spots


Ridiculous Rubik's
Mother of Pearl


Fall-ing For You


under the sea


Here is an idea
Newspaper print nails
it is very easy to do
Anyway, to the nails, I hope you like them!


Here is how to do them: